Showing posts with label vegan. Show all posts

Tuesday, August 9, 2011

Seaweed Made Easy - Here's My Secret

I have a secret. (or had one)

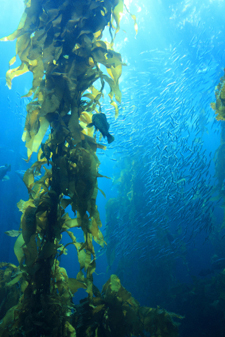
If you checked out my last post about seaweed, how delicious and therapeutic is, you have a glimpse into my love affair with it.  I am back after a weekend adventure to Lopez Island in the San Juans of Washington State where I harvested fresh bullwhip kelp (a brown seaweed variety native to the eastern Pacific Northwest waters).  There’s quite the kelp jungle strung up outside my window on my patio as I write this.  

My patio: drying bullwhip kelp blades 


I do realize there is a bit of involvement required to harvest ones own supply of sea vegetation; to plan a trip to an island, research safe places to harvest; camp and kayak your way through cold waters, out to ancient kelp beds with a pocket knife in hand and heavy duty bags stuffed between your legs in the intimate space of a kayak. 

That's me - with bullwhip kelp in hand. The long tube is the stipe and the bulb
at the end connects all the kelp blades.  Beautiful, right?


If you have the opportunity, do it, at least once.  There is quite a difference between store-bought, commercially-harvested seaweed compared to gentle, hand-harvested seaweed.  It's also quite a treat to transport this wet, heavy mass of kelp goodness homeward; string up ropes, wires and the like and spend a couple hours gently unfolding each and every piece to hang it up to dry in the sun.  You also have to love seaweed enough that when you hang it to dry, you don’t mind the occasional splat of salty-sea smelling, mildly slimy liquid slapping you in the face (kind of reminds me of the "spritz bath" I get from my friend's lovingly, snorty Boston Terriors). 

Harvesting and drying seaweed takes a bit of time, but is well worth every moment.  I love to connect with my food.  And truly there is this sweetly sublime moment when you are holding onto the stipe of the bullwhip kelp as it is still connected to the sea floor.  There is this moment when you are very aware of how magnificent it is to be sitting so close to the water atop a strong and mighty fortress of kelp.  

Close up of bullwhip kelp.
Fun fact: Kelp can grow up to 100 feet long and the blades up to 12 feet!  
If you don't have the opportunity to harvest it fresh,  I suggest finding a friend who knows how to properly harvest it and is willing to share; buy from a wild forager who lives on the islands or buy from quality companies (like Eden Foods) in your natural foods market.  You want to know it's fresh, healthy, has been sustainably harvested and safely harvested from clean, moving waters.

Now for the secret. 

Adding seaweed to your dishes definitely amps up the flavor and nutritional profile.  And while there are some very adventurous and cultured palettes out there that will eat chunks of seaweed gladly, for the majority of the population, this might be a bit of a stretch. 

I would be doing you no favors if I raved about how much of a treasure seaweed is without offering a gentle and easy way to incorporate it into your diet and to use it with ease.  It’s not a super revolutionary idea.  But it is a simple, practical tip and in my book, that equals awesome.

Here’s my tip: Ground the dried pieces in a spice grinder until it’s a fine powder.  Pour your ground kelp into a spice shaker and place it next to your salt and other cooking spices.  You can sprinkle it on almost any dish you prepare and do so as liberally or conservatively as you like.  You can use it as a salt substitute and reduce your sodium intake as well.  

Dried kelp to the left; ground kelp to the right

Some days, I'm feeling spunky and break out the arame, hijiki and wakame and boldly deck out my dishes with sea vegetables, but in the day-to-day in the Nester home, this is how I roll.  Eggs over easy, quinoa, oatmeal, stir-fries, pizzas, you name it; they all get a sprinkling of ground kelp.  This is a wonderfully accessible way to incorporate this nutrient-rich super food consistently and add it in to dishes in such a way that is kid friendly, too.  

If you are feeling a little cheeky, you can add it to vegetable frittatas that you serve your in-laws and not tell them until afterwards.  I also am not shy with adding it to a batch of brownies or cookie dough.  Most people never know it’s in there.  Come on, cookies AND minerals… heck yeah.


Photo By Dale Nester: Bullwhip kelp on San Juan Island


Go harvest or buy some kelp.  Ground it up.  And go seaweed crazy. It’s far too easy to incorporate this mineral-rich, tasty and extraordinary food into your diet than you may have ever thought. 


***Note: If you have a hyperactive thyroid or are concerned about iodine content in seaweed, talk with your physician before consuming seaweed on a regular basis. 

Tuesday, July 26, 2011

I Got Seaweed Fever

Wakame (photo via)

And you know what I need?  No, not more cowbell (although that would definitely be my second choice).  I need to get out in the pristine waters of the San Juans and harvest my own kelp.  I have a trip planned to Lopez Island (Washington state) in less than 2 weeks and I’m itching like crazy to get in my kayak, to sit on the moving, cold pacific waters in the midst of ancient kelp beds and to just breathe the salty air.  There is something extraordinary and transcendent about being in the presence of living seaweed and connecting to such a life-giving force.  

For now, I’m fixing my itching by making Ginger Wakame Crisps (recipe below).  Wakka what?  Pronounced "wok-uh-may," this glorious sea treasure is a deep, richly green colored kelp (though actually in the brown algae family: Undaria pinnatifida).   

Wakame is just one of many varieties of seaweed. You might have seen it in miso soup since it is traditional to Japanese cooking and culture.

What’s the big deal about seaweed?

Glad you asked.  It’s a huge deal.  It’s been prized and eaten for literally thousands of years as a powerful, sustainable, medicinal and tasty food source.                                                                                                                                                                                                    
Here's why:

  • Mineral density!  Think of minerals when you think of seaweed.  Seaweed contains ALL the minerals the body needs for hundreds of vital biochemical pathways that take place every single second: calcium for bone health and cell signaling; iodine and selenium for thyroid function; iron for oxygen transport and energy metabolism; sodium and potassium which are essential for electrolyte balance --- just to name a few!
  • It’s an excellent detoxifier.  Seaweed contains alginic acid, which has the remarkable ability to bind toxic heavy metals and other toxins (like dioxin) so they can be excreted and not absorbed by our tissues; heavy metal toxicity places an enormous burden on our bodies and is the source of a lot of dysfunction and dis-ease at the cellular level.
  • Helps prevent cancer and tumor growth. For the reasons listed above, but especially for colon and estrogen-related cancers like breast cancer; however if a patient is undergoing chemo or radiation therapies, incorporating brown seaweeds into the diet are a must for ongoing support.
  • It’s anti-viral, fighting off viruses that can penetrate and infect our DNA, like HIV and Herpes (both I and II).
  • Great plant source of B vitamins, especially B12: important for everyone, but definitely vegans and vegetarians who have to be mindful about getting enough B12 in their diets. 
There are just a few of my favorite therapeutic benefits, but also keep in mind that seaweed is a powerful antioxidant, rich in both phytonutrients and fucoidan compounds, additionally making consuming seaweed especially good for:

  • Boosting the immune system
  • Growth of shiny, healthy, hair, nails and skin
  • Weight loss
  • Heart health (as an anti-coagulant)
  • Controlling blood sugar and lowering the risk of Type II Diabetes
  • Quelling inflammatory conditions in the body (your guts, your joints)
Who wouldn’t want those benefits?  Let me assure you that as much as I love the medicinal profile of seaweed, I would not make a whole dish out of it if it didn’t taste good!  

I challenge you to go to your natural foods market (or visit Eden Foods) to purchase dried wakame and make this dish.  You may be completely surprised by how easy it is to toss back a handful of this crispy, subtly sweet, salty treat.  If you aren’t feeling quite so bold but really want the medicinal benefits of seaweed, stay tuned for the next post on seaweed for a tip that makes eating seaweed easy for any palette.  If you have a sensitive gut, it’s not a bad idea to start slow to allow your body time to assimilate a new food.

And finally, I wrote up this recipe a few months back and am dedicating it to one of my dearest friends, Siona.  Within a week of first meeting her a couple years ago, she shared this pearl, this gospel of good news, this thing called, kombu: seaweed.  I was in awe.  And I remember the exact moment of this first introduction because it was a gift of knowledge that had been imparted, that resonated with my passion for whole food and food as medicine.  We were taking a walk near Waverly Beach Park in Kirkland, WA as we admired the beauty of the lake and the glimpse of the space needle in the distance.  Since then, I have harvested it myself, researched in depth the many varieties, nutritional and medicinal properties and cook with it several times a week in my home.  This friend and I marvel together over our love for this sea treasure, just as much as we marvel over rich, creamy, full-fat, good, quality ice cream. 

For some, seaweed or sea vegetables is nothing new.  You’ve had sushi wrapped in nori, or miso soup with shreds of wakame in it, but for many Americans, seaweed is not a part of our regular diets.

It should be. 

I am so grateful for gaining a deeper understanding of this powerful food and so now I impart this to you!

1/2 cup of dried wakame (right) with same amount hydrated (left)

There are numerous varieties with a range of flavor profiles, so try a few different kinds and see what you like.  …more on seaweed harvesting, sustainability and ways to use seaweed everyday in a future post.  

Any seaweed questions, post ‘em up!  Whose got a fever?


Ginger Wakame Crisps
__________________________________________________________________ 
I made these mineral-rich, ginger and sesame-spiced seaweed snacks in honor of one of my dearest friends, Siona Sammartino, who lives, breathes and dreams seaweed!  There is a lovely little restaurant called Nettletown that is nestled away in the Eastlake area of Seattle; it happens to be one of our favorite places to frequent especially because of the crispy seaweed appetizer on the menu.  You can serve this as a unique and tasty appetizer, a topping for salads, Asian noodle dishes or simply enjoy it as a salty snack.
__________________________________________________________________ 


Preparation time: 40 minutes
Serves 4

½ cup dried wakame
¼ cup coarse grated ginger root
2 tablespoons toasted sesame oil
1 teaspoon tamari
1 teaspoon brown rice vinegar
Pinch of white pepper (optional)


Pre-heat oven to 350°F.

To re-hydrate wakame, place it in a medium size bowl and cover with plenty of water for.  Let the seaweed set for 5-10 minutes while you prepare the dressing.  It will grow at least 5 times in volume. 

In a small bowl, squeeze the juice from the grated ginger using your hand to wring out every last bit.  Discard the pulp.  Add the oil, tamari, vinegar, white pepper and stir. 

Drain the wakame and a use a towel to gently blot the seaweed to soak up as much water as possible.  Pour the liquid mixture over the hydrated seaweed and carefully toss to coat.  Spread half of the wakame on a large baking sheet making sure to not leave clumps so the heat can circulate and make them nice and crispy.  Bake for 15-17 minutes, or until the seaweed crisps up.  Use a spatula to remove the wakame crisps from the pan and place on a plate lined with paper towels.  Repeat for the remaining half of seaweed. Enjoy!
  

Copyright 2011, S. Nester, Original recipe
_____________________________________________________________________________


***Note: If you have a hyperactive thyroid or are concerned about iodine content in seaweed, talk with your physician before consuming seaweed on a regular basis.  Wakame specifically contains 50-150ppm of iodine. 

Sources:

Wednesday, May 4, 2011

Lemon Peppered Fiddlehead Ferns


I spotted these vibrant green, rustic, whimsical cuties at my local natural foods market and I couldn't resist.  Now that spring is in swing, I've been itching to get outside and wild forage for my meals like a true wilderness girl, which I like to pretend I am in my nonexistent spare time --- hence the purchase of wild foraged foods FROM the market.  


I sautĂ©ed them in olive oil, fresh minced garlic, sea salt and pepper (which you can never go wrong with, right?).  I squeezed some fresh lemon on at the end for a little jazz.  The taste reminds me of a cross between asparagus and the stalk of broccoli.  I'm liking it.    


Which by the way, just because they were at the grocery store looking all sexy on the shelf doesn't mean they don't come with some precautions.  Fiddleheads may be toxic if consumed raw.  It's a good idea to give them a good rinse, then steam them for about 15 minutes and finish them with a sautĂ©.  Make sure they no longer taste bitter and are thoroughly cooked, tender yet still with a little crisp.


Though they come with a small warning, definitely don't run away from them.  They have too much goodness to offer!  Fiddlehead ferns are packed with minerals and vitamins, especially vitamins A and C; and the minerals calcium and potassium.  They also contain omega 3 and omega 6 fatty acids. Bonus.  


They are known for boosting the immune system and for having cancer-preventative properties.  They are highly regarded as a delicacy item across many cultures and are typically only available in markets in the early spring, April thru May.  If you spot them, don't pass them up!


Growing in the wild (photo via)

When selecting fiddleheads, look for a bright green color, firmness, small ones with a nice tight curl, since they are best harvested in development before the curl uncoils.  Enjoy them as soon as possible and don't let them hang out in the fridge too long. 

If you're feeling spunky and want to harvest your own, I recommend doing a little research first (as with any wild edibles).  Here's one site that has a few quick tips for picking fiddleheads.

What do you think?  Do they look like something crazy Tim Burton might serve you for dinner or are they totally adorable?

Saturday, April 9, 2011

Sauerkrautin' - The Pickled, The Pink and The Skeptical

Pink Juniper Sauer Kraut
Well, it's about time for something "pickled" on Pickled, wouldn't ya say?  So let's go with something vibrant, beautiful and delicious!


Menu: 
Pink Juniper Sauerkraut.


And the chef is the skeptic. Well sort of. I say this because I'm conquering a fear I've had since I was 8 years old.


I’ve fermented tempeh, kefir, pickles, beer, salsa and kombucha but I’ve intentionally avoided sauerkraut for YEARS.  It goes like this: 2nd grade, at a friend’s house, her mom made me eat a bowl of sauerkraut with hotdogs. I literally remember my gag reflex freaking out and some tears to follow = traumatized.  


Twenty years later, I’m making some baby steps to heal that old wound (now that I'm all grown up).  Plus, I was a super picky kid.  To my delight, I have found many of the foods I despised as a child, I now have come to love.  So, not only do I want to give sauerkraut a second chance, but making sauerkraut is totally fun.  I'm going to rebel a bit from proper recipe format if you don't mind.  Part of the adventure in sauerkrautin' is that you can't really screw it up and you get to break out your MacGuyver skills by resourcefully rigging together containers, jars, whatever you have on hand in your kitchen.  Below is a quick and dirty recipe along with some photos of the process.


But first, why won't I just let this go and throw it in the doghouse (along with my other blacklisted foods like red onions and celery)?  It's because sauerkraut is a living food.  Cultured, pickled, fermented foods are a part of almost every culture and have been a cherished method of preservation and nourishment for hundreds (perhaps thousands) of years.  Fermented foods are packed with flavor and remarkable medicinal qualities, specifically beneficial microorganisms essential for health.

Fermented foods have too much in their favor to be written off so easily.  Here's what I'm talking about:

·        not only are nutrients retained, but new ones are created, like: the B vitamins, essential amino acids and anti-oxidants
·        it’s a powerful raw, digestive aid that can help better digest proteins and fiber from your food
·        it enhances nutrient bioavailability
·        it's a PRObiotic (the Greek word meaning: "for life"), which balances out the damaging and depleting effects that our intestines may be exposed to throughout life, such as:
o       chronic stress
o       chlorine
o       caffeine
o       alcohol
o       tobacco
o       food additives
o       antibiotics/prescription drugs
o       chemotherapy
o       birth control pills
o       nutritional deficiencies
o       exposure to environmental toxins
·        an improper balance of the good bacteria has been linked to chronic disease
·        fermented foods contain anti-carcinogenic enzymes to help our bodies prevent and fight off cancers
·        they are detoxifying
·        this good bacteria helps stimulate the body's natural defenses and help protect us against infections from pathogenic bacteria, yeasts and fungi

The bottom line: One powerful way to build a foundation for a strong immune system, vibrant health and longevity, is to show some love to your intestinal tract and start incorporating fermented/cultured foods into your diet.


A little history: I love food history, don't you?
Typically, ferments are made in the fall when the idea is to preserve the harvest for the winter months (though fermenting can be done year round of course).  This particular method of preservation retains the vitamin C, which can be harder to come by in the winter time.  In the late 1700s, a British sailing crew ingeniously traveled with loads of barrels full of sauerkraut on board and successfully staved off scurvy during their 27-month voyage.


And a fun fact on your intestinal eco-system:
Each person has up to 3 lbs of bacteria living in their large intestines.


What's happening during fermentation?
Fermenting is quite a phenomena.  Food can be preserved for years without refrigeration.  Not only that, the nutrients are preserved, digestibility is enhanced and the flavor profile is amplified to ever increasing deliciousness.


When you ferment vegetables, you are making a lacto-ferrnent, meaning that the sugars and starches in these vegetables convert into lactic acid by the bacteria known as lactobacilli.  Lactic acid preserves the vegetables so they don't spoil AND it promotes the growth of healthy microogranisms in your large intestines.


Here's the quick and dirty way to make homemade sauerkraut:

Gather a mix of half red cabbage and half green cabbage


Slice chiffonade-style...


...until it looks like this...


Add juniper berries or other seasoning of your preference (such as pepper, caraway, fennel, garlic, ginger) 


Combine the crushed juniper berries, cabbage in a bowl with salt and toss (salt keeps it crunchy and from rotting until the lactobacillus bacteria has a couple days to develop; use about 3 tablespoons of salt per 5 lbs of cabbage)


Add it to a ceramic crock, glass jar or a food-grade plastic bucket


Mash, mash, mash... (you can use a potato masher, a wooden masher or your clean fist)


And keep mashing... you may want to recruit some help (meet Dale, my hubby, professional krauter)


Yep, keep on mashing - put some muscle and some love into it


Mash until the salt draws out the water (the brine) from the cabbage and is enough to cover the cabbage       by ~1 inch


Find a plate that fits in your jar and cover to protect the ferment from being exposed to the air, creating an anaerobic environment

Add a weight of sorts (I used a glass jar filled with water) to push the plate down firmly until the brine rises above the cabbage and onto the plate


Throw a towel over your ferment to keep dust and bugs out.  Tuck it away in a cool dark place. Check on it after 24 hours to make sure there is enough liquid.  If not, mix about a cup of water with 2 tablespoons of salt and add it in until the kraut is submerged in the brine.  Press the plate along with the weight down firmly again; cover and let it ferment for 1-3 weeks, more if you like.  Just be sure to peak at it every day or so to make sure the liquid hasn't evaporated out and add more if needed so the kraut is submerged in the liquid.  


The flavor will evolve over time, so it's a good idea to try it each week until you get it the way you like it. Mold and foam may form around the surface. This is completely normal since this part is exposed to air.  Just scoop it off and discard.  I like to make small batches at a time, so I've canned mine and refrigerated it. 


2 weeks later: There you go - pretty, pink juniper sauerkraut!


Sauerkraut is only one of many ways to enjoy living foods that offer this beneficial bacteria.  Make it your aim to have a probiotic food every day since this good intestinal bacteria needs to be replenished often.  Here are a couple ideas to help incorporate the sour, tangy goodness of sauerkraut into your meals.


·        make a smoked salmon reuben with havarti cheese on rye (num num num) 

·        enjoy a couple of tablespoons on the side of any meal (even once a day would make a difference)

·        eat it with a bowl of hotdogs.  I kid.  Unless, of course you're into that, then go for it!

·        actually, it's quite lovely with sausage and apples


What if I want to eat it but I don't want to make it myself?
That's cool too.  Look for it in the cold section of stores and look for live cultures on the label.  Not all sauerkraut or fermented foods still contain their live cultures.  They may have been pasteurized, which kills off that friendly bacteria we are aiming to obtain.  As always, read your labels!

Stay tuned for more adventures in home fermenting and digestive health.

In the meantime, if you get inspired to try some on your own, I recommend the book Wild Fermentation by Sandor Katz (listed under Pickled's Picks at the bottom left of this page) or visit his website: www.wildfermentation.com.  He's well known and highly respected as a fermentation revivalist. 

Till then, happy fermenting and be kind to your guts.

Tuesday, February 8, 2011

Cherry Tarragon Lentils with Roasted Squash

Looking for a gluten-free, vegetarian dish or just want to change things up with some savory lentils? 

Try this recipe: Cherry Tarragon Lentils with Roasted Squash.

I like to incorporate lentils into my meals every week or so.  They are a fantastic alternative to heavy meat dishes and yet offer a satisfying and hearty protein contribution to your meal.  

Photo via
Lentils
They are wonderfully beneficial for your heart, kidneys and circulatory system.  They help lower LDL cholesterol and lower blood pressure. Lentils are not only mild and tasty, but they are also a good source of fiber and can therefore help prevent blood sugar levels from rising. 

Photo via
Cherries
Are yummy.  And that would be perfectly fine if that's all they ever contributed in life. 

BUT, they have so much more to offer us in additional to being sweet, beautiful gems. They are rich in anti-oxidants, high in vitamin C, iron and folate. They are especially beneficial for inflammatory conditions and have been known to reduce the risk of heart disease.  They are certainly best fresh and in season, but dried cherries can definitely be enjoyed year round.

Squash
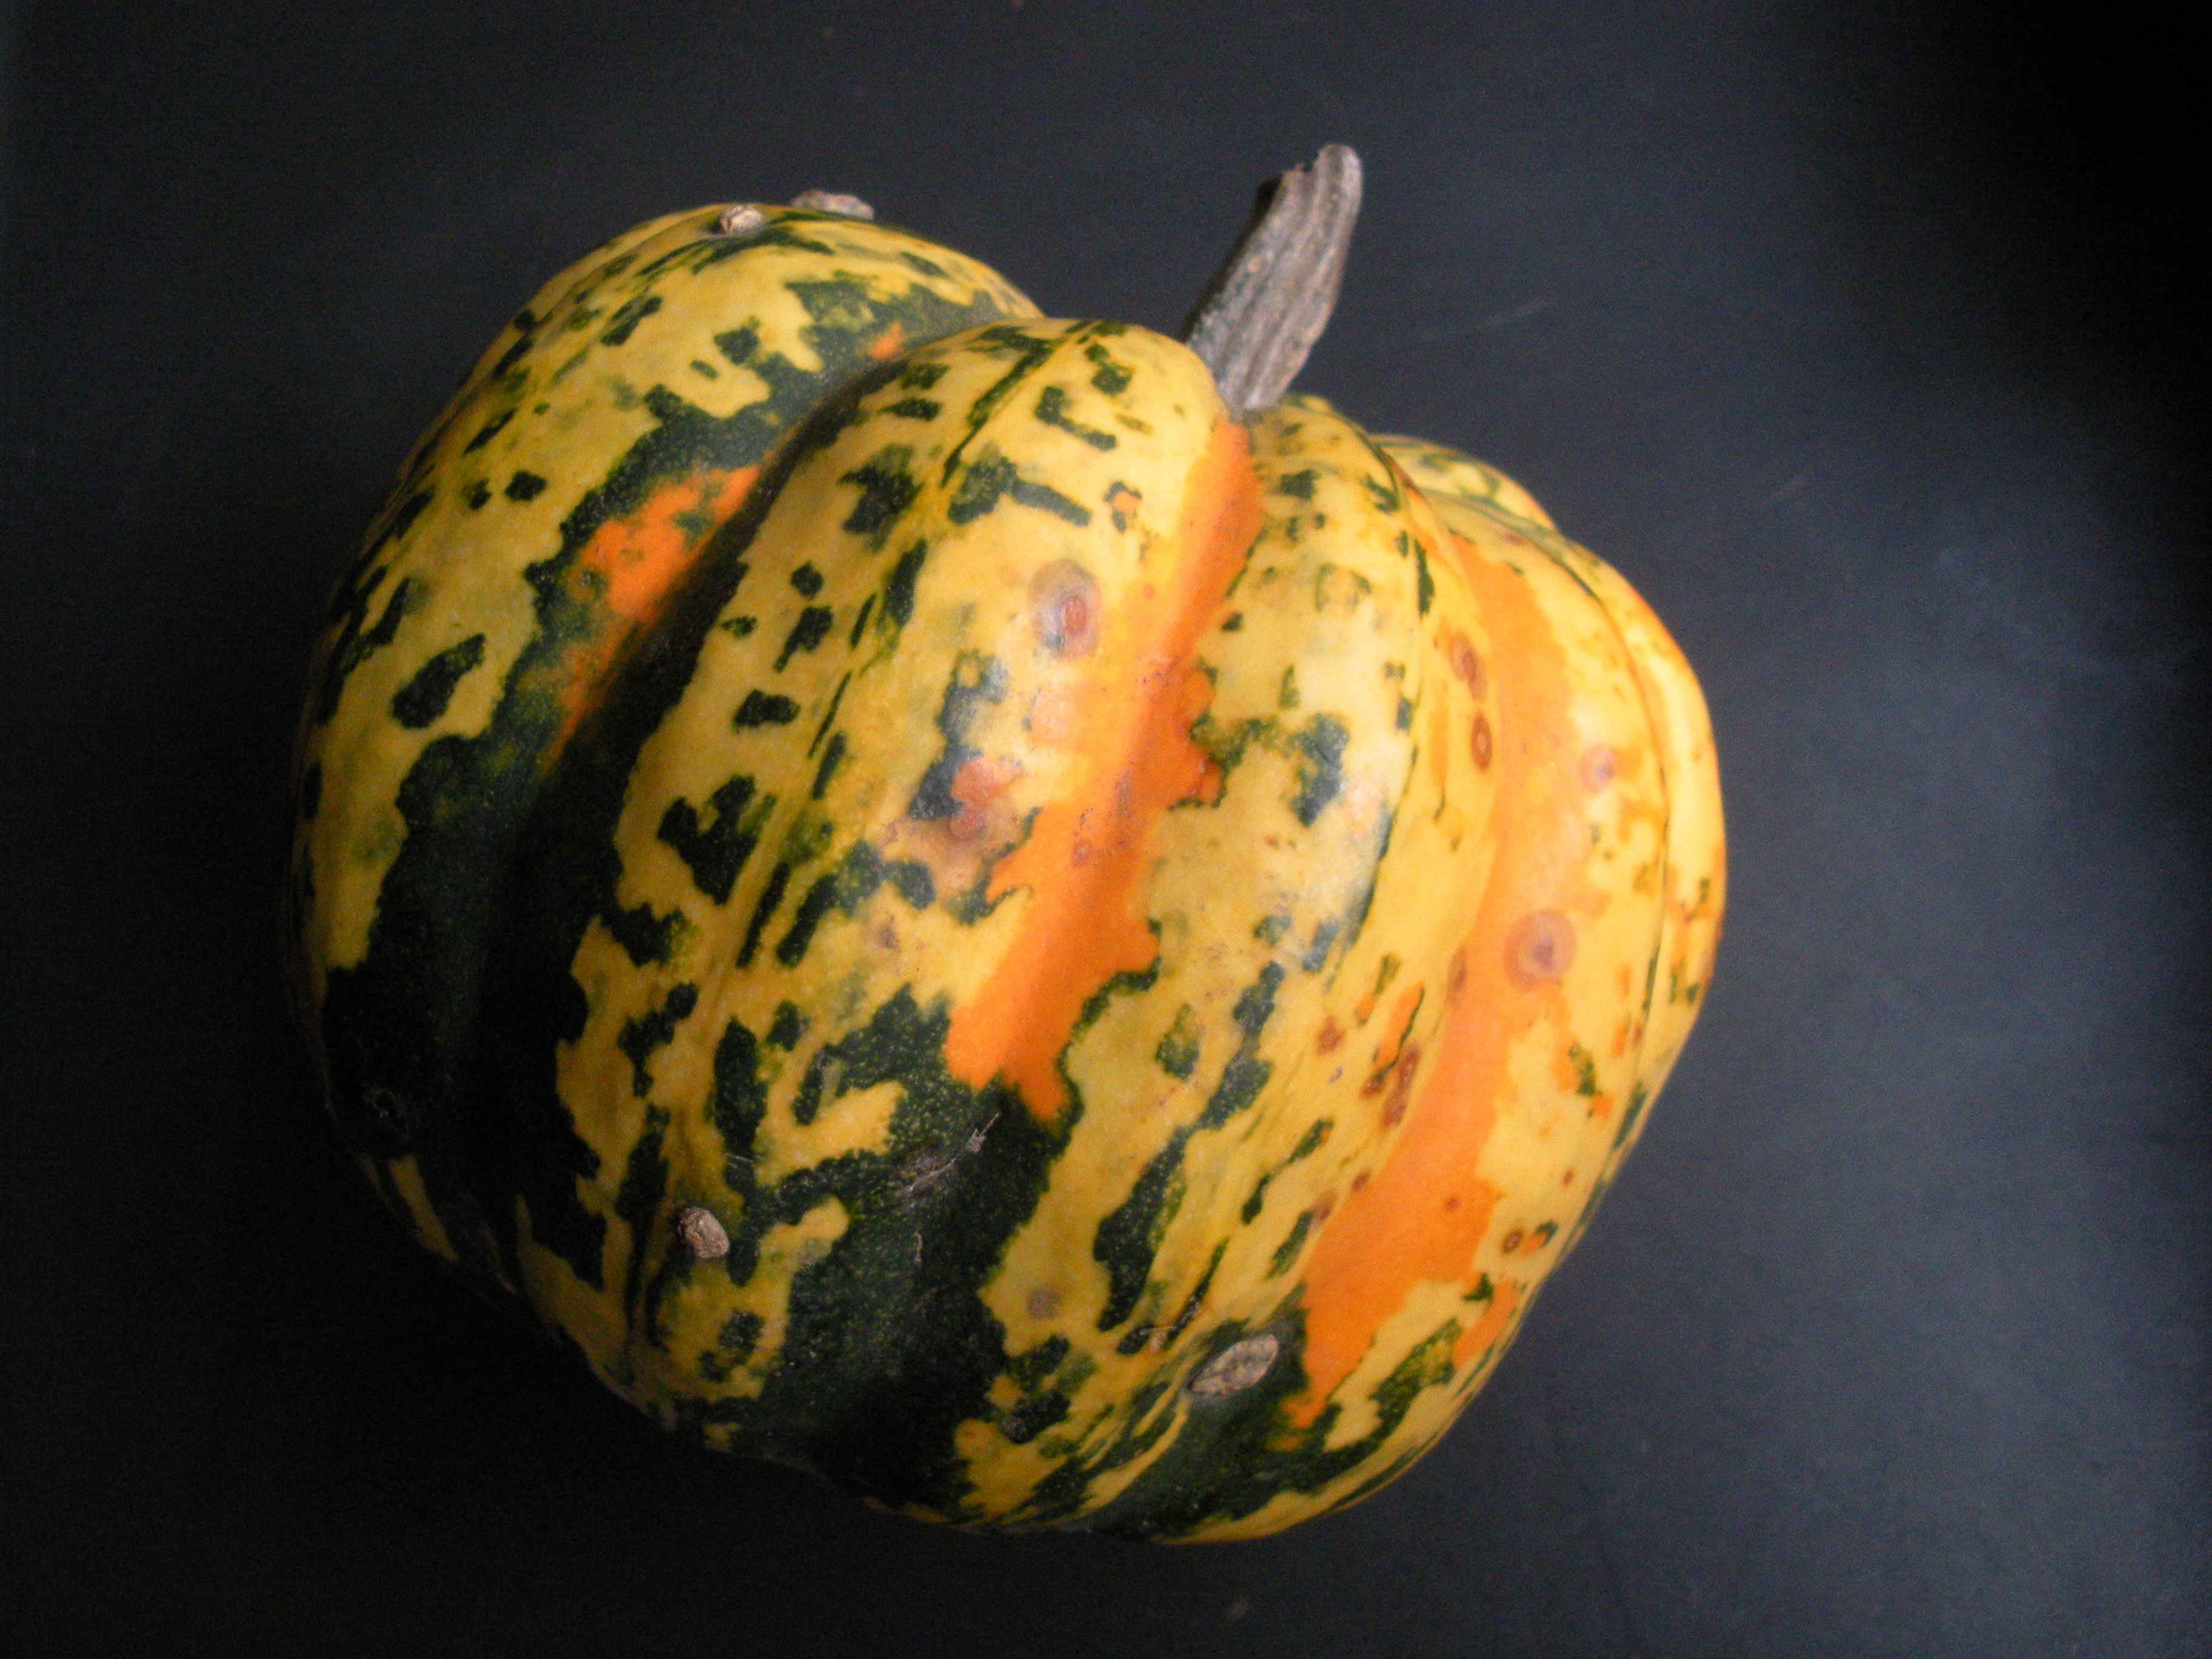
A warming winter staple that offers energy as a complex carb and helps increase circulation.  Since it has a noticeably bright orange flesh, you can guess that it's an excellent source of beta carotene or carotenoids (good anti-carcinogens).  Squash is also rich in vitamin C, iron and magnesium.  I like to use the small sweet varieties such as:

Carnival Squash
Photo via

Buttercup Squash
Photo via
Kabocha Squash
Photo via
Photo via


Tarragon
Primarily offers its brisk, anise flavor but is also supports digestive health.  Always, always use fresh tarragon.  No if, ands or butts. It's purely blasphemous to use dried tarragon.


...And for the recipe!  Enjoy.


___________________________________________________________________

Cherry Tarragon Lentils in Roasted Squash

Not only do lentils and squash together make a complete protein, but this hearty vegetarian entrĂ©e is also easy on the budget.  The light and fresh licorice flavor from the tarragon marries well with the sweet bing cherries, bringing together the succulent taste of lentils in a cozy bowl of tender roasted squash. It presents beautifully on the plate and is backed up with flavor.

___________________________________________________________________

1 sweet squash such as carnival, buttercup or kabocha
Extra-virgin olive oil to drizzle
1 cup French lentils
1 bay leaf
2 1/3 cups vegetable stock, divided
2 tablespoons butter, divided
½ onion, sliced into half moons
1/3 cup dried cherries, roughly chopped
2 heaping tablespoons of fresh chopped tarragon
2 tablespoons of lemon juice
1 teaspoon balsamic vinegar
½ teaspoon sea salt

Pre-heat to 375°F.

Slice squash in half around the equator and brush with oil.  Place flat side down on baking sheet and bake for about 1 hour, or until tender when pierced with a fork.  

While squash is roasting, prepare lentils by combining lentils, bay leaf and 2 cups of stock in a pot and bring to a boil.  Reduce heat to low, cover and simmer for about 30 minutes.  Lentils are done when all liquid has been absorbed.  

Meanwhile, melt 1 tablespoon of butter in a skillet over medium-low heat.  Add onions and caramelize, about 20 minutes.  Stir frequently.  Remove onions from skillet and place on a cutting board to give it a rough chop.  Add the remaining tablespoon of butter to the skillet and then add the cherries and tarragon.  Stir for about a minute or so and then add in the lemon juice, vinegar, salt and remaining stock.  Toss mixture with lentils and serve inside the squash bowls or over top the quartered squash.  Garnish each with a sprig of tarragon.  

***This recipe can be easily vegan or dairy-free by caramelizing the onions in olive oil instead of butter.

  
Preparation time: 60 minutes
Serves 4

Copyright 2011, S. Nester, Original Recipe

Tell me what's on your mind!

Click the comments link below the post to share your thoughts.